How do I set up my class and student groups in Lessonpress?
Open "Students" from the menu and use "+ New group" to create a class, then add your students by typing their names or importing them from a CSV. Make as many groups as you need — a class per period, or a small intervention group — since you can group students however you like. No student emails or accounts are involved; it's your private roster (your own list of students), and it's what powers scoring, class reports, and Class Mastery. Classes are part of the Teacher and Pro plans.
Step by step
Create a class
Open "Students" from the menu and click "+ New group." Name it however makes sense — "Period 3 Math," "Room 12," or a small group like "Tier 2 reading." You can make as many as you need.
Add your students
Type names one by one, paste a list (one name per line), or import a CSV (a spreadsheet file, like from Excel or Google Sheets). A header row with first_name / last_name columns is recognized but optional — without one, each line is read as a name. There are no student emails, logins, or accounts; the roster is private to you.
Organize into groups however you teach
Groups are flexible: keep one group per class, or make separate small groups for intervention and enrichment. Because they're easy to create, you can spin up a short-term group for a few weeks of targeted work and retire it later.
Attach a worksheet and score it
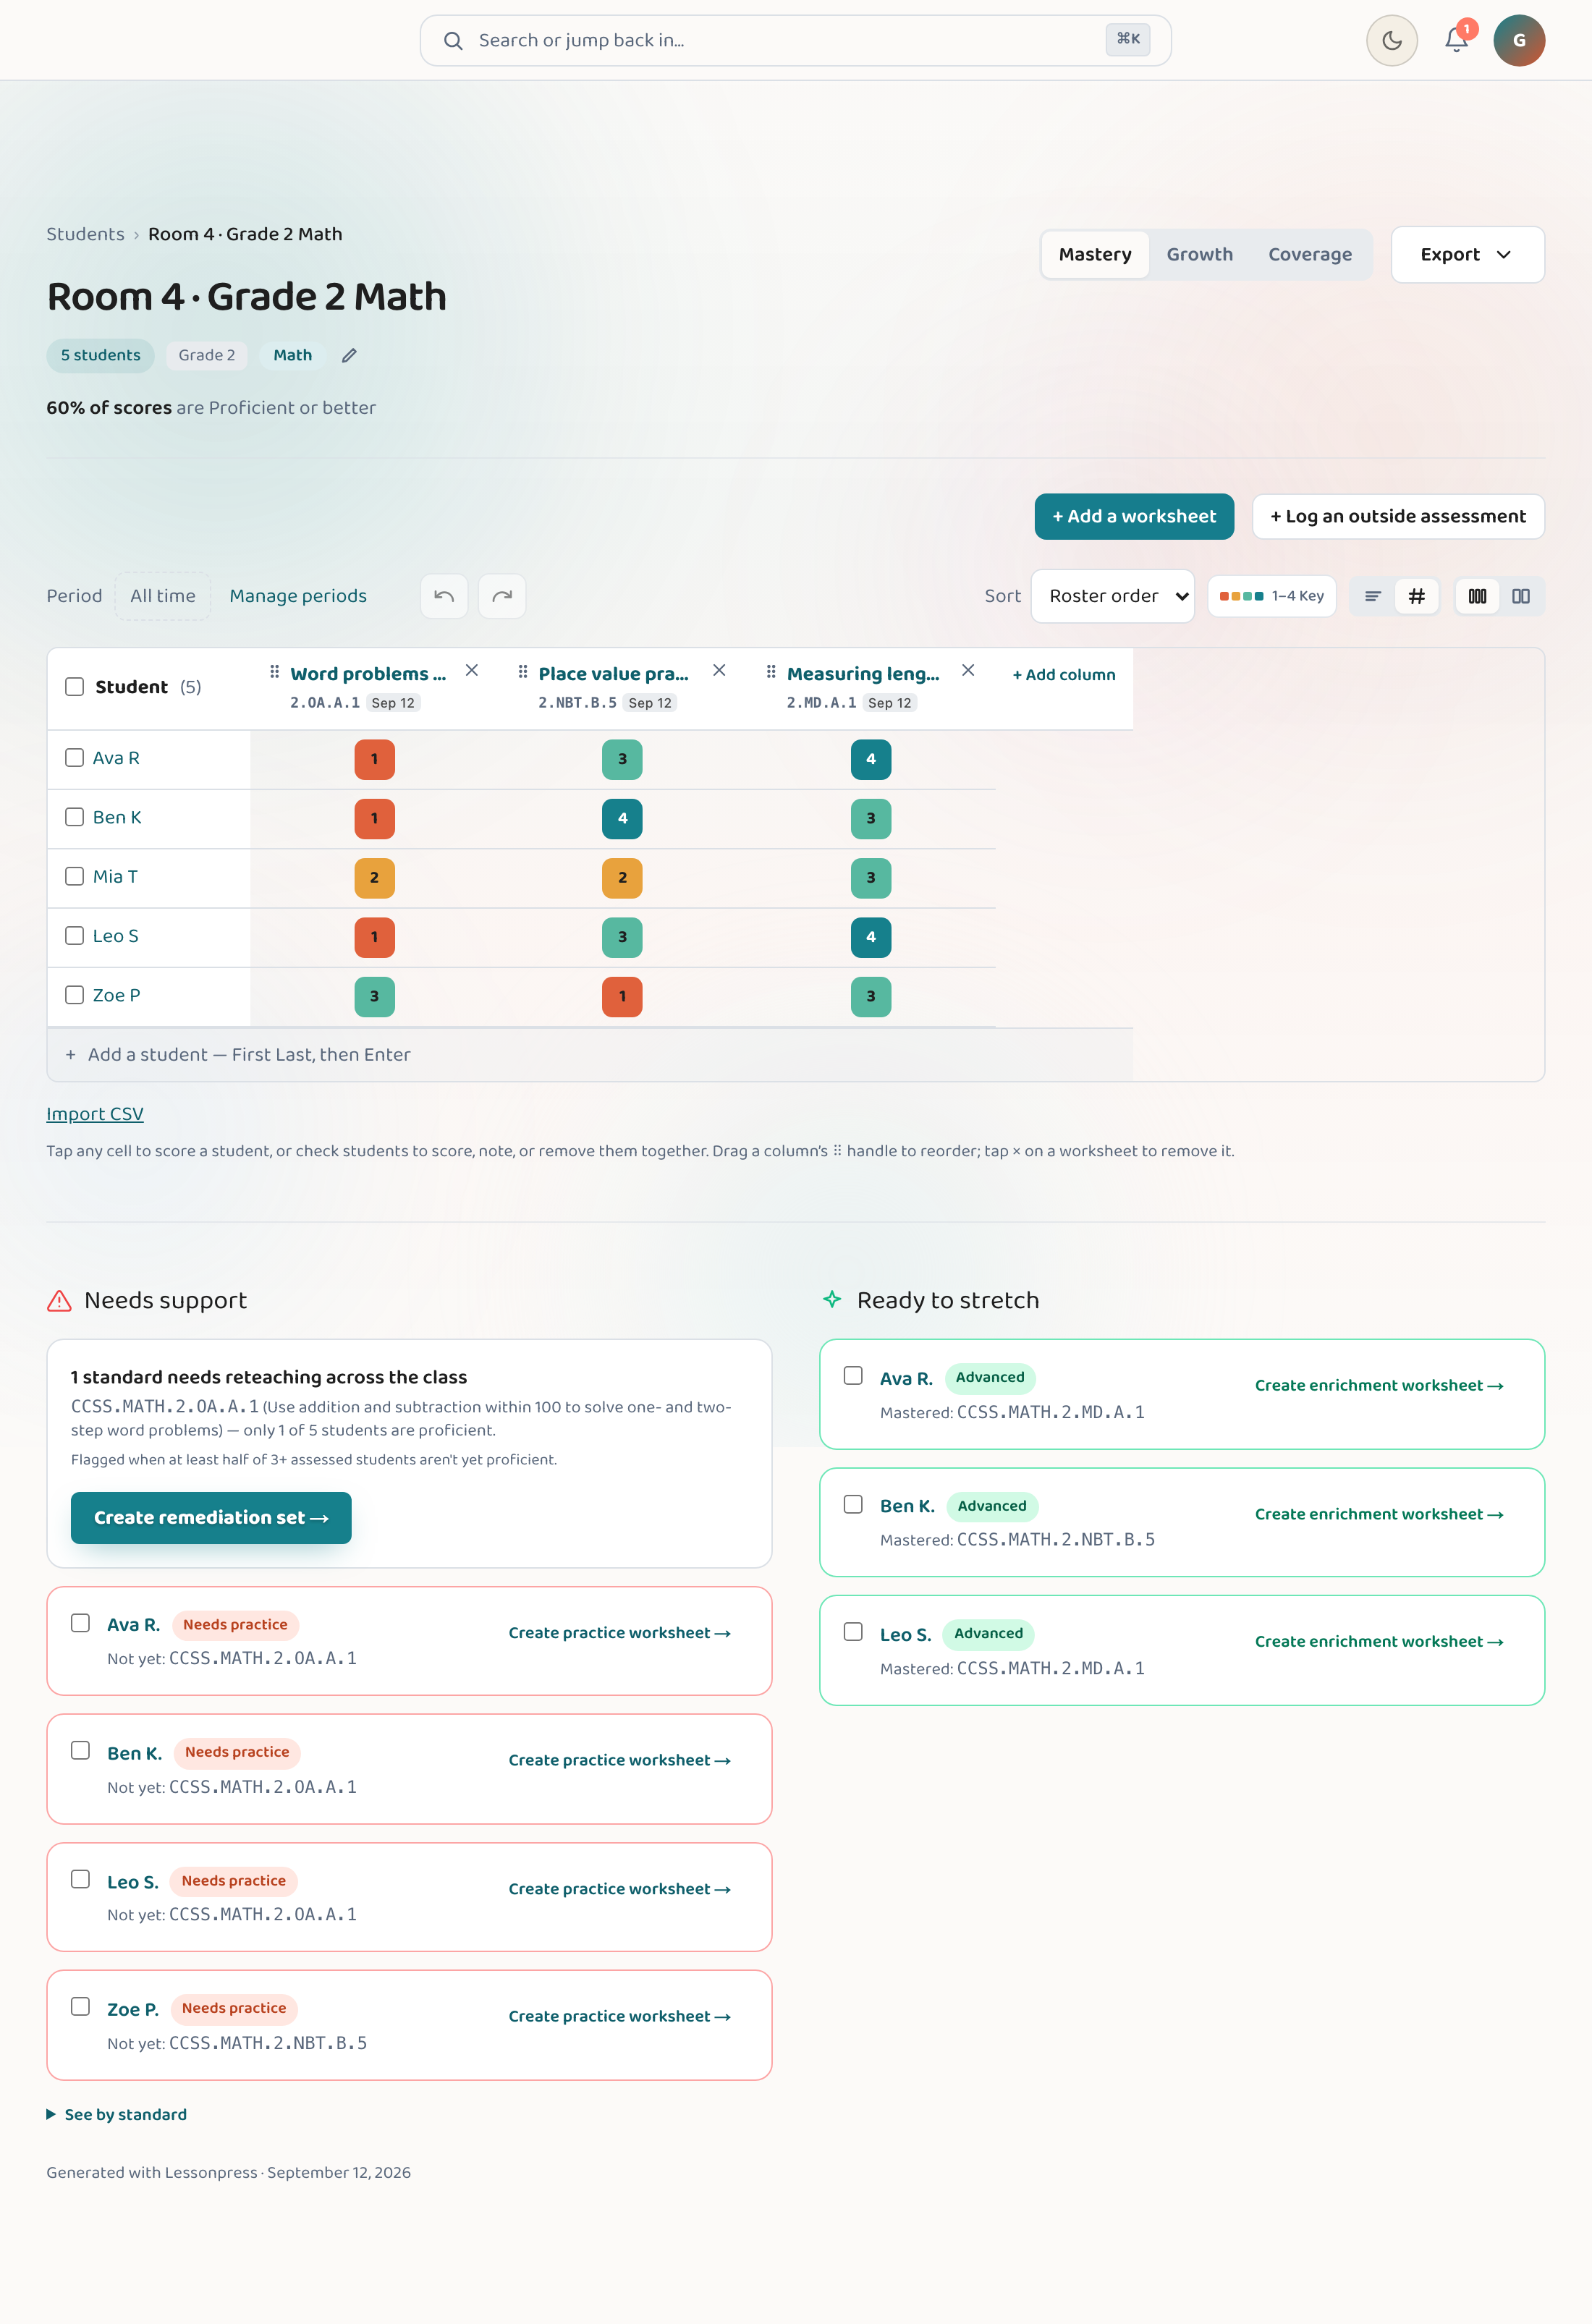
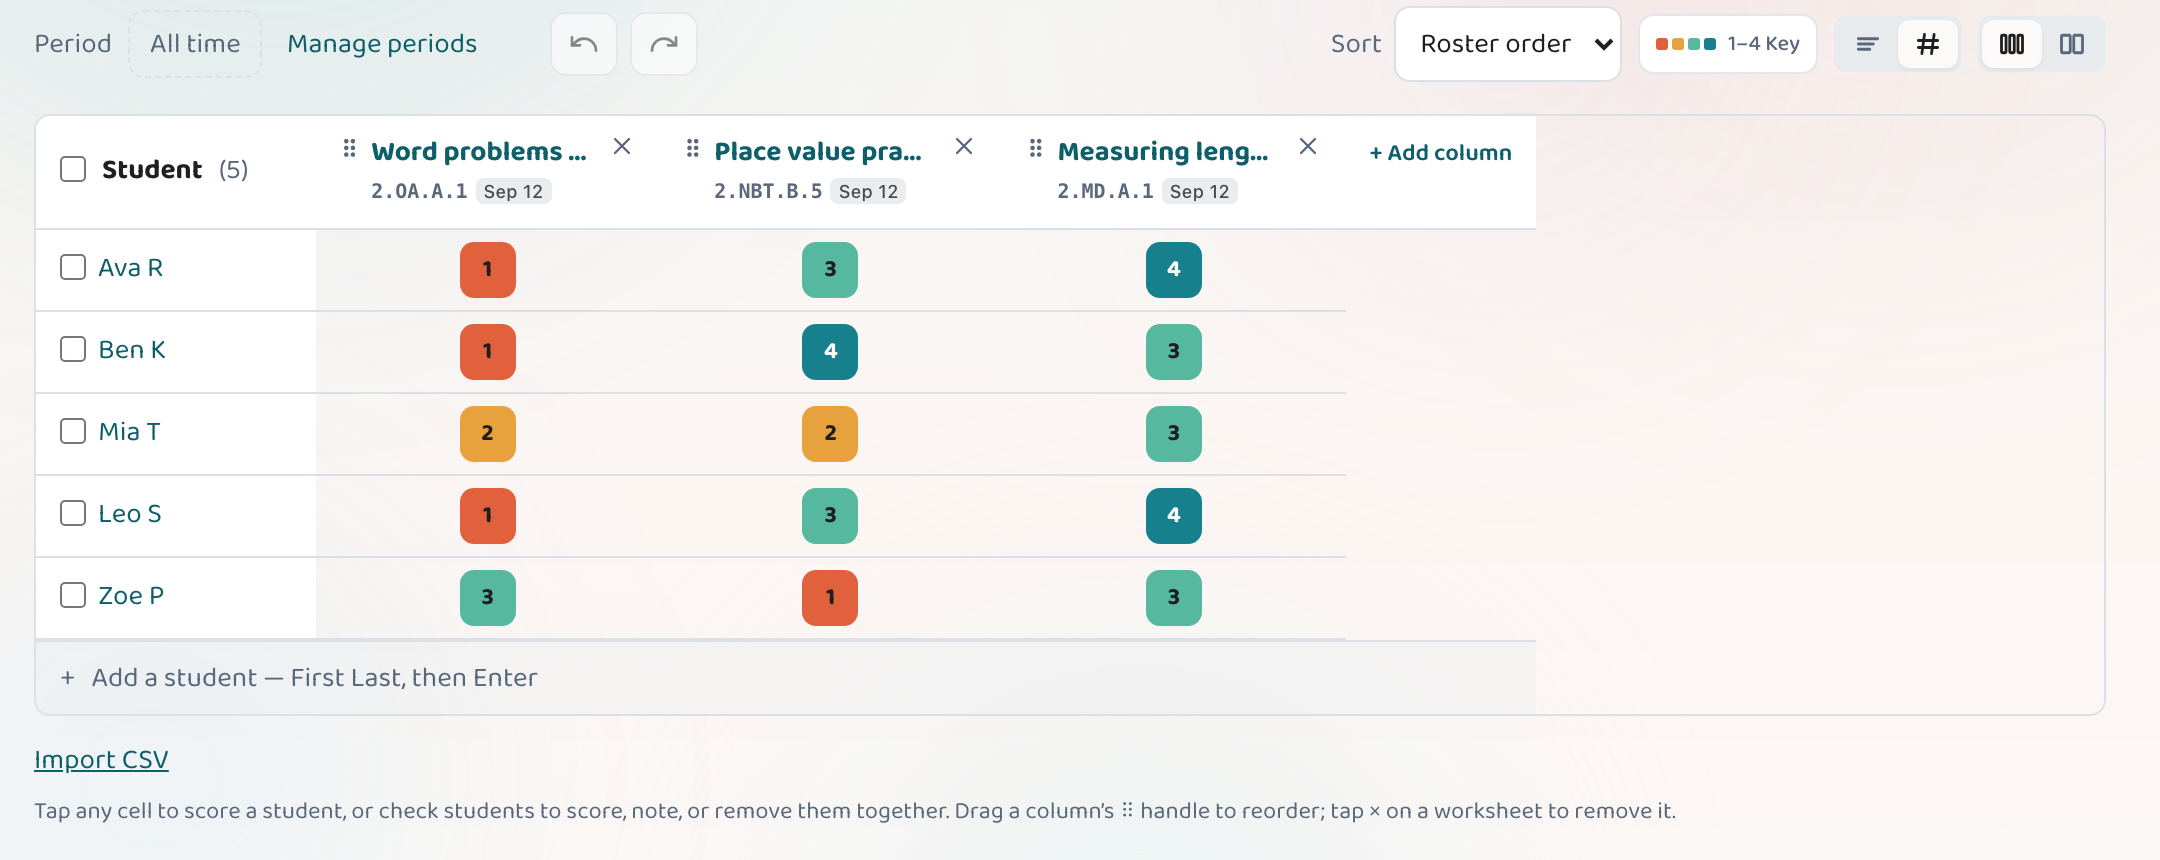
On a class's Mastery tab, use "+ Add a worksheet" to link a worksheet you've made and mark how each student did on the scoring grid. That's the moment your roster turns into progress data.
Read the Mastery tab
Once you've scored anything, the Mastery tab shows a per-student mastery grid and rolls it up for the whole group — your home base for spotting who needs what.
Good to know
- A CSV import is the fast way to set up at the start of the year — one upload instead of typing every name.
- Make flexible small groups for intervention or enrichment; they don't have to match your homeroom.
- Rosters keep up with mid-year changes — add, rename, or remove students any time.
- The "+ Add column" button in the scoring grid lets you add a custom column with any label — handy for tracking a skill, behavior, or observation that isn't tied to a standard.
Common questions
Do my students need accounts or emails?
No. A class is just a private list of names you add or import. Students never log in, and no student emails are stored.
What's the difference between a class and a group?
They're the same building block — a "group" you create under "Students." You can make one per class period, or smaller groups for intervention and enrichment. Group students however fits how you teach.
How do I import a class list?
Paste your list (one name per line) or upload a CSV when adding students. If your CSV has a header row with first_name / last_name columns, Lessonpress uses it; otherwise it reads one name per row. Either way it adds everyone at once instead of typing each name.
Can I add, remove, or rename a student later?
Yes. Add students any time, rename a student, or remove one — removing a student also clears their scores. So your roster keeps up with mid-year changes; you're not locked into the list you started with.
Who can create classes?
Classes and the roster tools are part of the Teacher and Pro plans. Every new account gets 7 days of Pro, so you can try them before deciding.
Set up your class, free.
Add a class, score a worksheet, and watch mastery fill in by standard. Free 7-day Pro trial — no card to start.
Set up your class